DIY Wet Bag
December 5, 2011 at 10:00 PM 11 comments
DIY Wet Bag
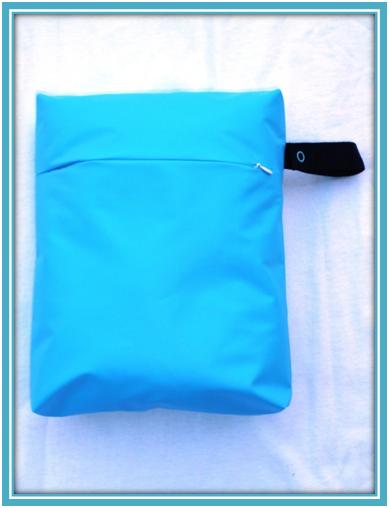
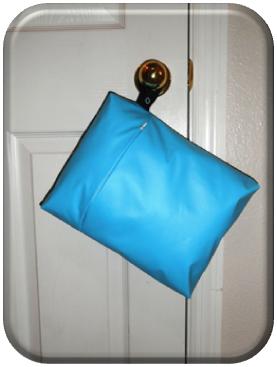
If you are into cloth diapers and/or cloth momma pads for the sole purpose of being more green, or simply more healthy, then this wet bag is for you! Even if it has nothing to do with being green, this wet bag may be right for you. It is re-useable, so it creates less waste. It is customizable, so it can be very personalized. It’s portable, so it can travel wherever you go. It can hang on the bathroom door knob (or any door knob) for convenience without creating an eyesore.
I personally use it when I travel in order to keep my unmentionables unseen. It is a great dirty laundry bag for those items you don’t really want others seeing…and, it is washable!
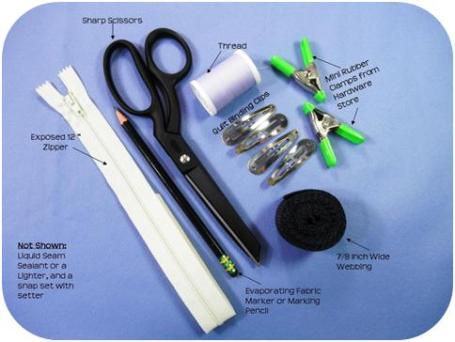
Materials:
- 28″ X 12″ Piece of water proof or water resistant fabric like PUL (left) or ProCare Barrier Fabric (right)
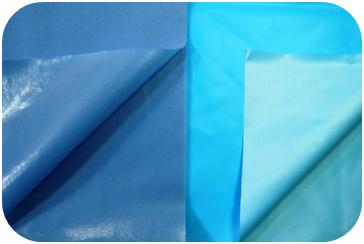
PUL (LEFT – Purple) is a vinyl (shiny) backed fabric that is soft to the touch. It feels a lot like flannel on the “right side.” PUL is lighter or less thick/dense than ProCare Barrier fabric. ProCare (RIGHT – Aqua) is similar to a durable vinyl tablecloth with the exception of the backing being some sort of affixed woven mesh with a matte finish. PUL is commonly used in cloth diapers and diaper covers, both infant and adult. ProCare is hospital grade, non-woven, waterproof fabric.
- 7-9″ Exposed Zipper
- A Zipper foot and a Teflon (non-stick) Universal Foot for your Machine
- 8-9″ Long Piece of ⅞” Wide Webbing
- 1 Complete Snap Set
- 8-10 Quilt Binding Clips or Rubberized Mini Clamps from a Hardware Store (No Pins b/c we don’t want to create holes for liquid to sneak through.)
- Thread
- Marking Pencil
- Sharp Scissors
- Sewing Machine
Instructions:
Remove the selvages from the piece of fabric.
ZIPPER: The two shorter edges will be where the zipper goes, so lay the piece of fabric in front of you in a tube shape with that opening between the two shorter edges facing up. You should be looking at the “right” side of the fabric which is the side you want to see when the project is finished.
Lay the zipper, centered, on one side of the opening. Mark where it begins and ends.
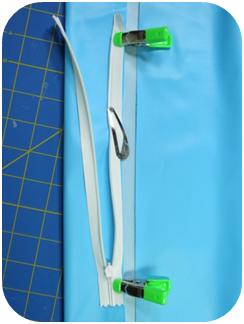
Placing right sides together, sew a straight stitch using a 5/8 inch seam allowance from your mark to the nearest edge on both sides. Remember to lock your seams.
(If you are using an invisible zipper, now is the time to press it open. Zipper instructions are always included with the zipper when purchased – it’s part of the packaging.)
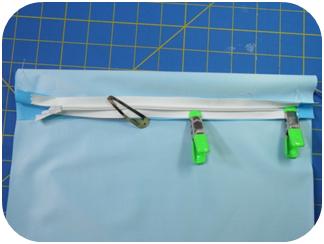
Place your zipper back in the center and secure it. Keep in mind how you want the finished product to look and work. Doing so will help you make sure you get the zipper in the correct way.
Notice above, the front of the zipper is facing the “right” side of the fabric and the whole zipper is moved over to the right hand side. Using the appropriate zipper foot, sew this side in place. Zip up the zipper and secure it in place on the other side of the fabric.

Now, sew this side of the zipper in place.
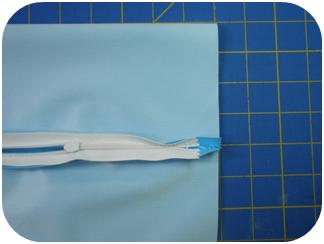
You should currently have a tube with a zipper inserted. Flatten out this tube and roll the zipper over the top by about four inches so that the zipper will be on the front of the bag, rather than the top.
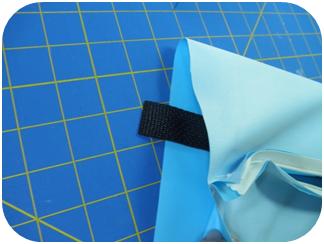
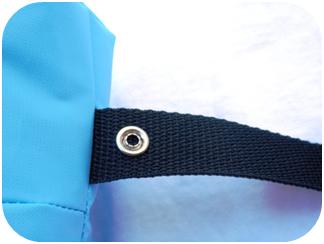
WEBBING: Fuse the ends of the webbing, either by melting them or by sealing them. Decide on the placement of your webbing, and tuck it inside the tube aligning its edge with the raw edge/side seam of the bag. I like it on the side of the zipper when it is completely closed, so I placed mine just above the seam on that side. (I made it stick out so you could see it.)
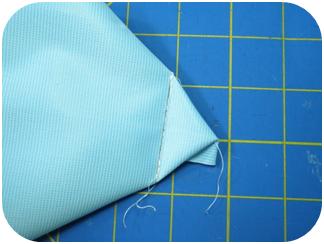
Straight stitch, using your Teflon* universal foot, down the right side of the bag using a ⅝” seam allowance. Remember to lock your seams. Unzip your zipper, and straight stitch down the left side. Again, lock your seams. Now, we’re ready to add gussets!
*If you do not have a Teflon foot for your machine, you can use a piece of cellophane gift wrap tape on the bottom side of your regular universal foot. Remember not to cover the area where the needle will penetrate the fabric. Keep that slit or hole free of tape so as to not gunk up your needle.
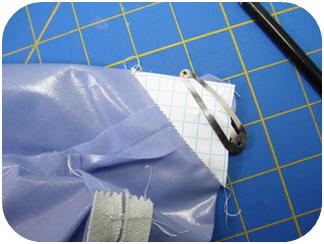
GUSSETS: Gussets increase the amount of useable space in a bag like this, and they are so simple to incorporate! There are several ways to do this. One way is to measure and mark as we did with the Zippered Pouch, and another it to create and use a template as such:
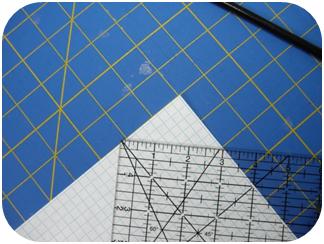
I wanted my gussets to be 3″ deep, so I measured a triangle from the corner of a piece of grid paper (any paper will do). I lined up the paper with the grid lines on my cutting board. When the measurement reached 3″ across the triangle’s base as shown above, I drew a line, and cut off the triangle. Of course, you’ll need to make sure the sides of this right triangle measure the same length too – hence, my grid. =) For you wonderful math people out there, just use the algorithm a2 + b2 = c2.
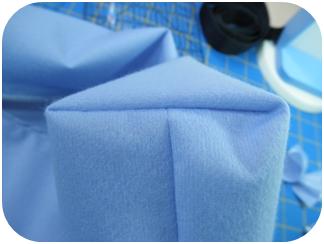
Roll the side seam at the corner until the seam itself is centered in the triangle. Secure the template. Straight stitch across the long edge of the triangle. Lock the beginning and ending of this seam. Repeat this procedure on the other three corners.
You can trim the fabric triangles off leaving ¼” to ⅝” seam allowance, if you want to.

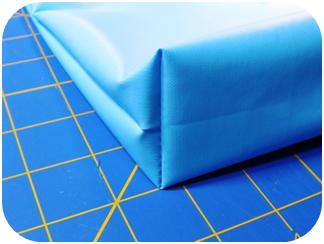
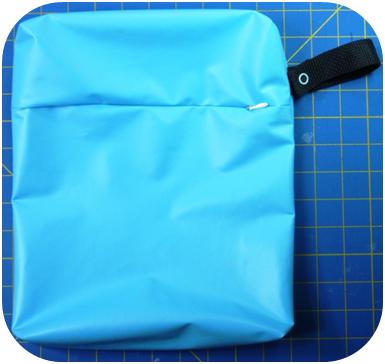
Turn the bag right sides out and admire your handiwork. Not only have you inserted a functional zipper, but you’ve made gussets as well! Good job!
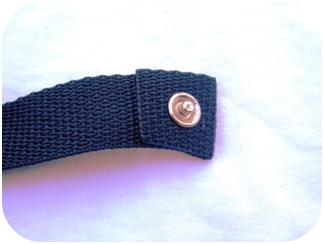
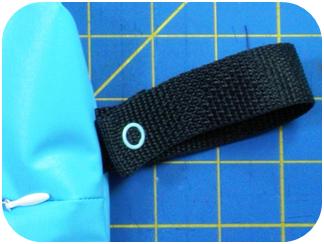
SNAPS: The final step is to place your snaps (according to your snap setter … there are several different kinds) on the webbing to create a loop for holding or hanging the bag. Fold over the far end of the webbing by about an inch and affix the one side of the snap set. Then, fold that piece over toward the bag in order to place the other half of the snap set where you want it to be for a good fit.
Ta-Da!
You CAN Sew!
***Click HERE for a PRINTABLE version.
We’ve joined the following hops to share our ideas this week: (Please visit one, or all, of these great sites for countless free project ideas and inspiration! If you are visiting from one of these great sites, thank you for coming!Your comments are truly appreciated.)
MONDAY:


TUESDAY:


WEDNESDAY:


THURSDAY:


FRIDAY:


SATURDAY:


Visit us online for other great projects and products!
Entry filed under: DIY, Girls, Girly / For Girls, Handmade, Home Life, Ladies, Matters of Modesty, Modesty Matters, Patterns, Sewing, Simple.
11 Comments Add your own
Leave a comment
Trackback this post | Subscribe to the comments via RSS Feed


1. Ces | December 6, 2011 at 10:02 PM
i think this is a unique and great idea
2. modestmomma | December 7, 2011 at 7:51 PM
Thank you!
3. Shiloh | December 7, 2011 at 2:41 PM
Awesome idea. I cloth diaper, and I’m ALWAYS forgetting a bag for my dirty diapers. If I had a permanent bag, maybe I would remember.:)
4. modestmomma | December 7, 2011 at 7:50 PM
Thank you! I love my bag – and they are so simple to make!
5. Esther | December 7, 2011 at 5:33 PM
Love this tutorial!! Thank you.
6. modestmomma | December 7, 2011 at 7:50 PM
You’re welcome! Thanks for coming by, and for the lovely comment. =)
7. Laura | December 8, 2011 at 3:51 PM
I just started sewing, and I’m bookmarking this for when i’ve gained a bit more experience! Looks like a great project – maybe Christmas gifts for next year!
Found you at bassgiraffe’s bloghop and have subscribed via email. Hope you’ll visit me at http://everythingbeautifulinitstime.com.
8. Jenn/Rook No. 17 | December 9, 2011 at 5:25 PM
Your bag turned out beautifully! What a wonderful idea and a great tutorial too!
So glad you were my “neighbor” at Tickled Pink!
Best,
Jenn/Rook No. 17
9. modestmomma | December 9, 2011 at 6:20 PM
Awe! Thanks so much! =)
10. Jenn/Rook No. 17 | December 12, 2011 at 4:34 PM
Thank you so much for sharing your creativity and talent on “A Little Birdie Told Me…” Tuesday at Rook No. 17!
Friends who link-up to tomorrow’s party will have a chance to win a $25 gift certificate to Hodgson Mill, so please feel free to stop by and join in the fun & inspiration!
Warmest wishes,
Jenn
11. Tamara @ Etcetorize | December 14, 2011 at 3:04 PM
Awesome project! I love all of the uses you came up for it. Thanks for linking up at Etcetorize~